Fast Way to Draw Chair Conformations For Beginners
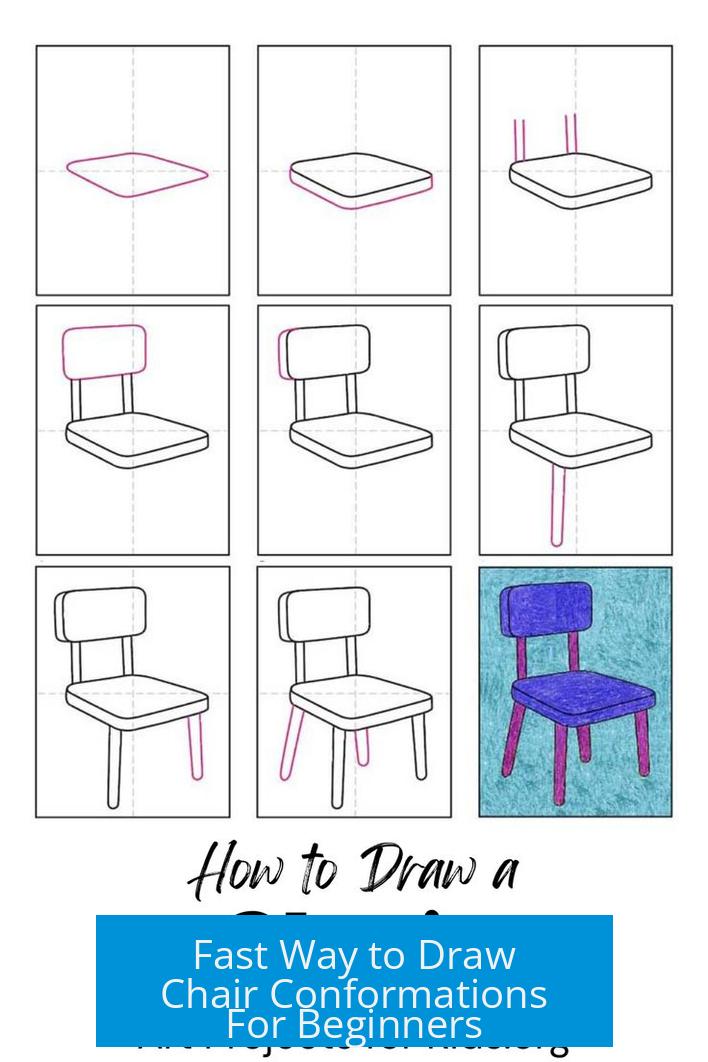
The quickest way to draw chair conformations for beginners involves starting with two parallel lines slightly offset and then connecting their ends to form a basic parallelogram framework. This simple outline serves as the base to sketch a proper chair shape, which can be refined by adding angled lines representing the carbon atoms. Using this method, beginners can reliably produce accurate chair structures with ease.
Step-by-Step Drawing Technique
Start by drawing two equal-length parallel lines. Offset them horizontally so they are not directly on top of each other.
Next, connect the top ends with a slanted line, and do the same at the bottom. This forms a parallelogram.
This shape is the “seat” of the chair conformation.
Then, extend lines from the corners at alternating angles to create the chair’s “legs” and “backrest.” This gives the classic zigzag shape of cyclohexane in chair form.
Though describing these steps is challenging, practicing them leads to fast, neat drawings.
Beginner vs. Alternative Teaching Methods
- Early teaching often begins with a simple method focusing on ease for beginners.
- More advanced methods provide better structural accuracy and are praised for producing beautiful chair drawings.
- The suggested two-parallel-line technique blends simplicity and accuracy and is suitable for beginners building confidence.
Using Objects as Mnemonics
Some educators use everyday objects to help visualize chair shapes. For example, a Budweiser promotional key chain has been mentioned as a mnemonic, though such objects may not always be readily available to all students.
Key Takeaways
- Start with two slightly offset parallel lines to form the chair base.
- Connect top and bottom ends with slanted lines to create a parallelogram.
- Add angled lines from corners to represent carbon atoms’ positions.
- Practice until the drawing becomes intuitive and accurate.
- Alternative teaching methods can enhance the quality of chair conformations.
How do I start drawing a basic chair conformation quickly?
Begin by drawing two equal parallel lines slightly offset. Then connect these with lines at the top and bottom to form a distorted rectangle. This shape forms the foundation of your chair.
What is a simple method to teach beginners chair conformations?
One beginner approach focuses on breaking down the shape into basic geometric steps. Starting with parallel lines and connecting edges helps learners visualize the 3D structure easily.
Is there a better method than the beginner method for drawing chair conformations?
Yes. An alternative method results in clearer, more accurate chair shapes. Students often create more precise structures using this approach, though it may require more practice.
Why is describing the chair conformation drawing process challenging?
The process involves spatial reasoning that’s easier to do than explain. Visual steps help more than words because the shape has subtle 3D angles.
Can everyday objects help in teaching chair conformations?
Yes, simple objects can serve as references. For example, a promotional key chain can model the shape, although finding one may be tricky for some students.


Leave a Comment